How To Print Barcodes With Excel And Word
The Best-Kept Secret in Microsoft Office

Before you spend money on special fonts or software, you should take a look at one of the best hidden native features of Microsoft Office—creating and printing barcodes. You can print several different kinds of codes from within Word. 1D codes like CODE128, CODE39, UPC A and UPC E, and EAN are available, and the big daddy of 2D barcodes, the QR code, is also included. This guide will show you exactly how to take advantage of these features. Related content: How to Create Good Inventory Item Numbers.
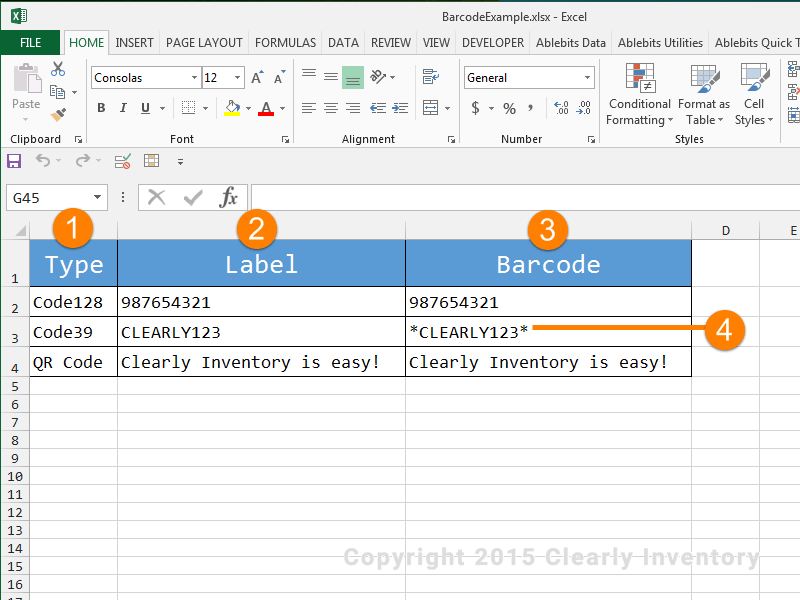
Create a table in Excel, exactly like the one below…
…By following these steps:

Label the first column “Type” and create three records: “Code128”, “Code39”, and “QR Code”, just like you see in this image.

Label the second column “Label” and create three records: “987654321”, “CLEARLY123”, and “Clearly Inventory is easy!”

Label the third column “Barcode” and create three records: “987654321”, “CLEARLY123“, and “Clearly Inventory is easy!” Yes, they look almost the same, but this is the actual information that we’ll be encoding in the barcode itself.

Those asterisks are CRITICAL. Without them, your barcode reader can’t decode the information as “CODE39”.
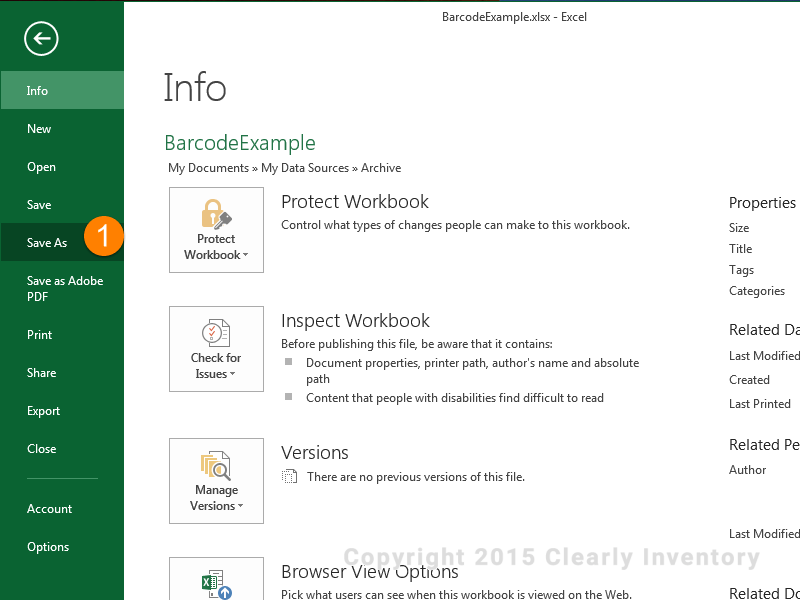
Click “Save As”…
…By following these steps
Click “Save As”.
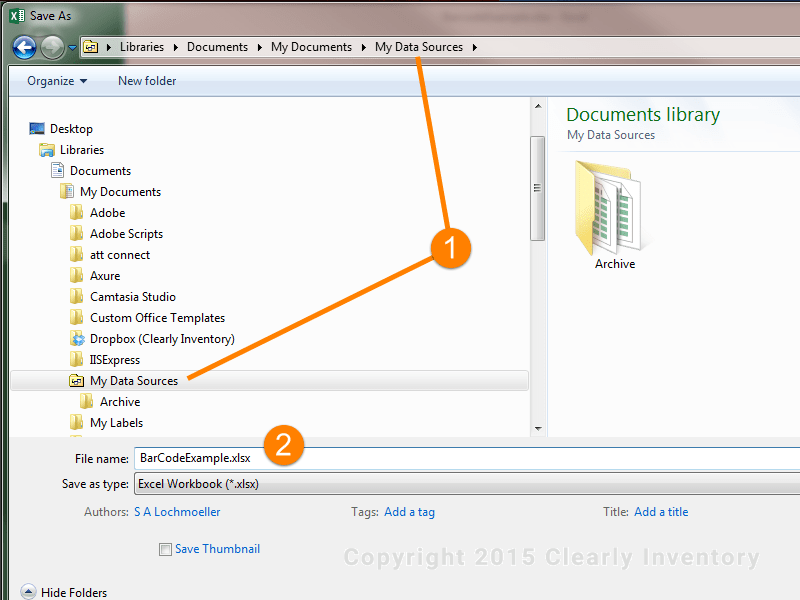
Save the file in this exact location…
…By following these steps
By default, Windows creates a “My Data Sources” folder in your “My Documents” folder. This is where Word will look for your tables when doing mail merges. You don’t have to use this folder, but it will make this example, and life, easier to follow.
Please use the filename “BarCodeExample.xlsx”. We’ll be referring to it later on.
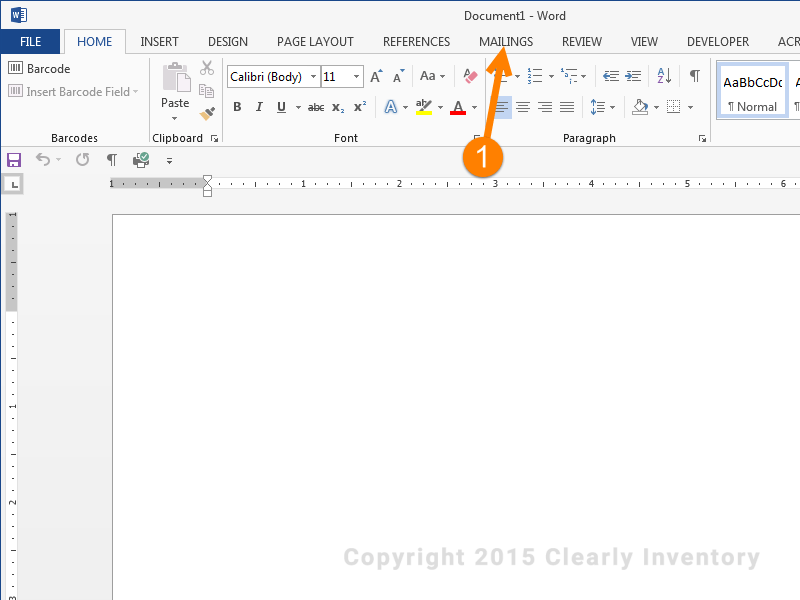
Open a new Word document and select “Mailings”…
…By following these steps
Open Word and click the “Mailings” tab. If you don’t have this tab, you might need to customize your toolbar to activate it. Google how to do that if necessary. You might notice that Word has a “Barcode” menu item. I did too. And to this day, I can’t get it to work properly. If you know how to, please drop us an email at support@clearlyinventory.com.
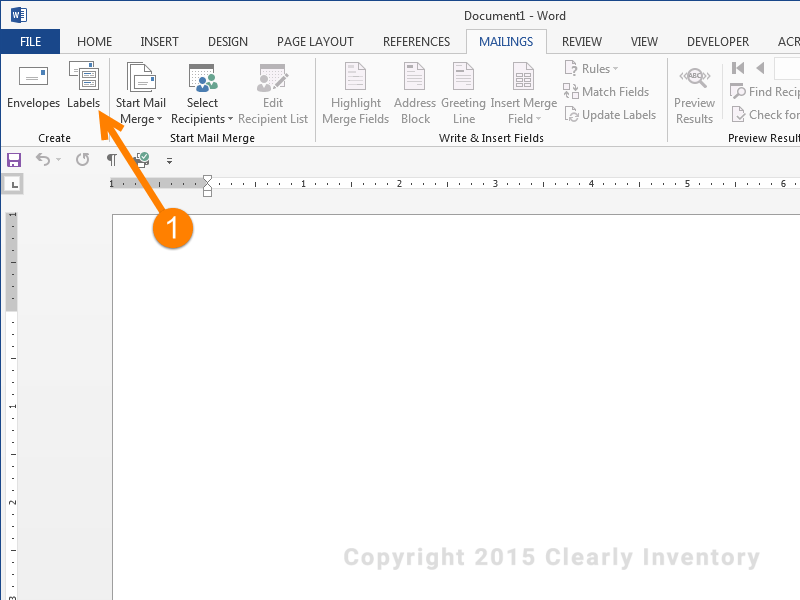
Click “Labels”…
…By following these steps
Once you’re in the “Mailings” tab, click on “Labels”. This will bring up a Label dialog window for you to select a label type.
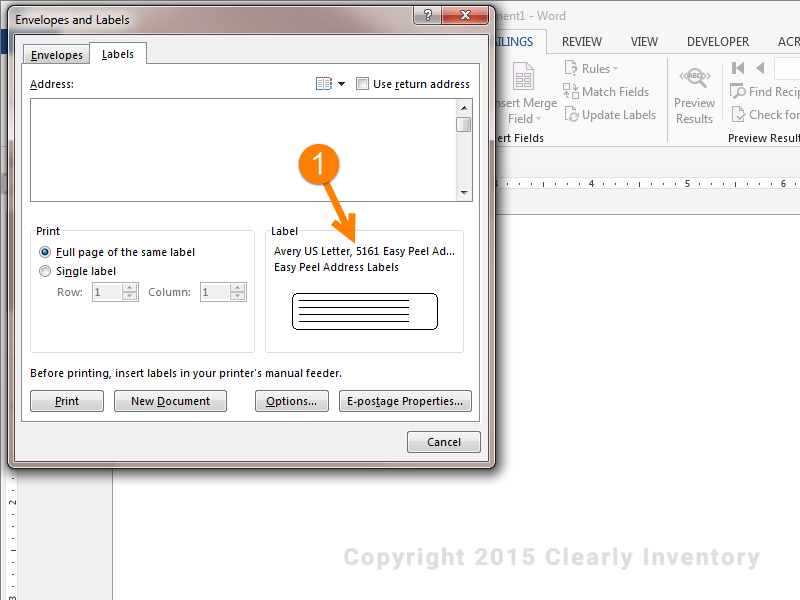
Select these exact labels…
…By following these steps
Click this area (you may not notice that it’s clickable, but it is, trust me). Then select the Avery US Letter, 5161 Easy Peel Address Labels. That’s what we’ll use for this example, but you can choose any number of labels when you do this on your own.
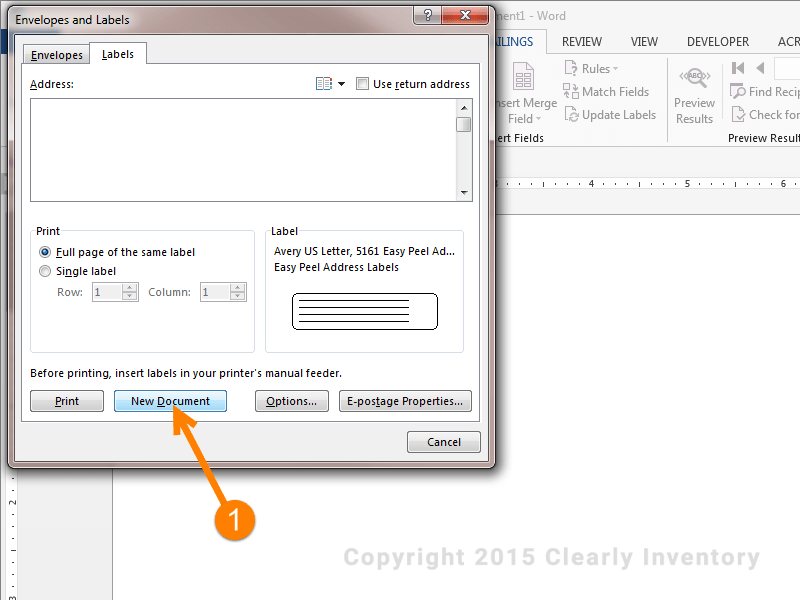
Click the “New Document” button…
…By following these steps
A lot of people make the mistake of clicking “Print” from this dialog. Instead, click the “New Document” button. Don’t be one of those people who can’t follow directions and gets lost.
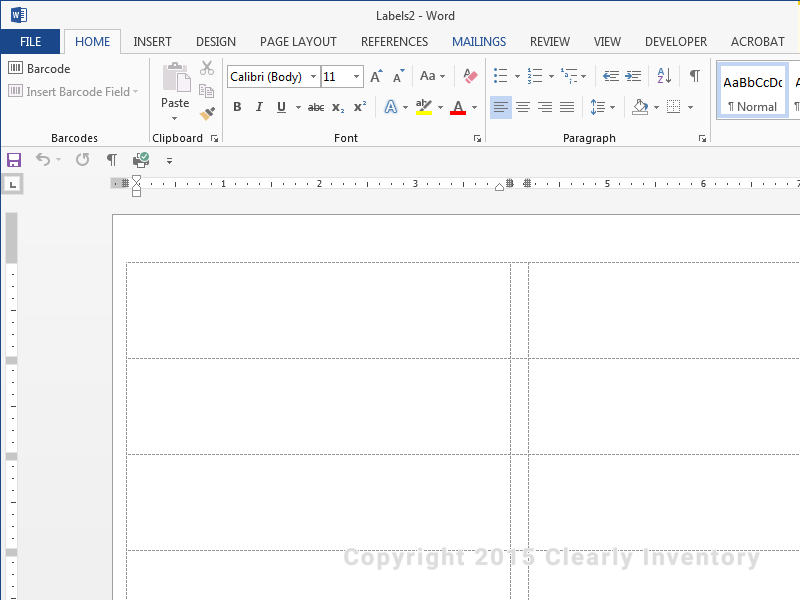
And your New Document should look like this…
…By following these steps
Yeah, I forgot to put a “1” on this image, but just bear with me. The image at left is what your New Document will look like. I point this out because, at this point, you will probably have TWO Word documents open: the original one where we selected the label type and this New Document. Make sure you’re working with the document that has the outlines of the labels.
Make sure to click the “Mailings” tab in your new doc…
…By following these steps
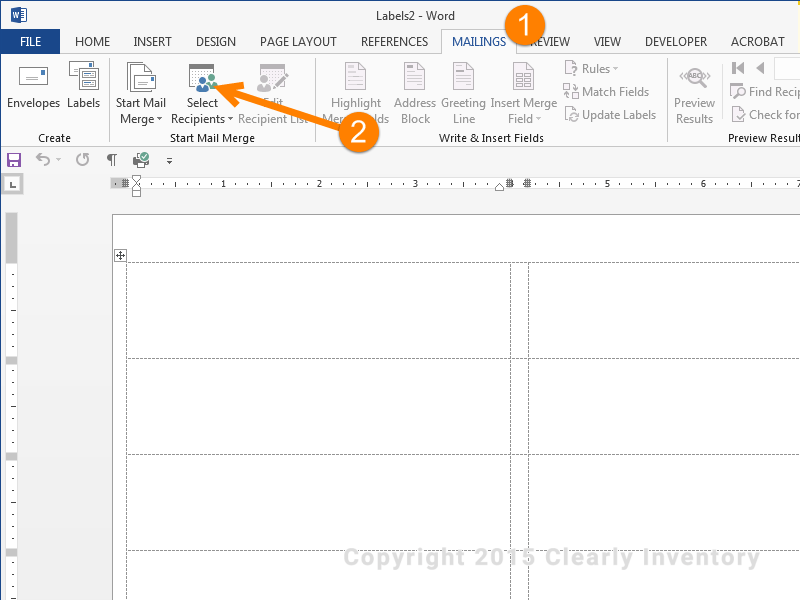
Make sure you click the “Mailings” tab again so you can see the Mail Merge options; otherwise, step 2 won’t make sense.
Click “Select Recipients”. This may seem weird, but what we’re really doing is choosing a table or spreadsheet with values in it. Because the most common use of this feature is mailing lists, Microsoft calls the data “Recipients”. Just keep up, and it will all become clear.
Select your “recipients” (hint: they’re really your barcodes)…
…By following these steps
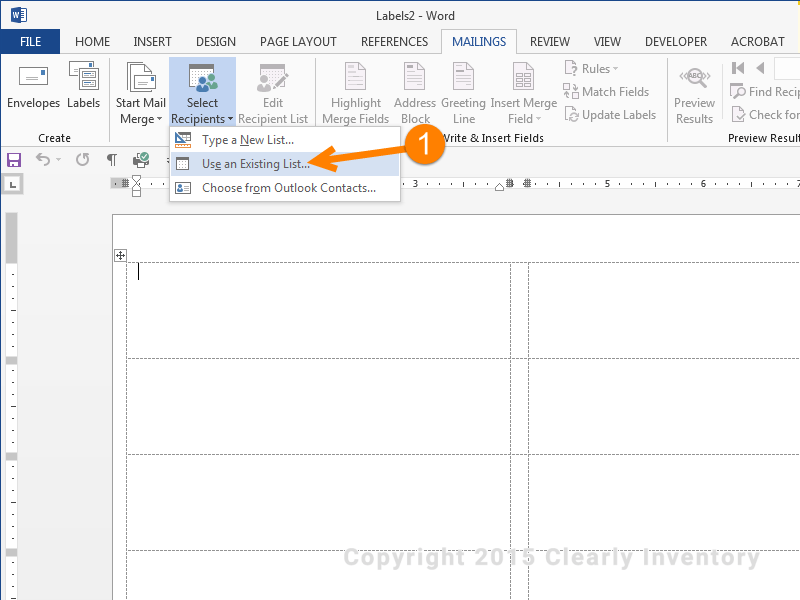
Choose “Use an Existing List…”. Remember the spreadsheet we created and saved at the beginning of this tutorial? It’s about to come back into play.
Choose the file we saved earlier…
…By following these steps
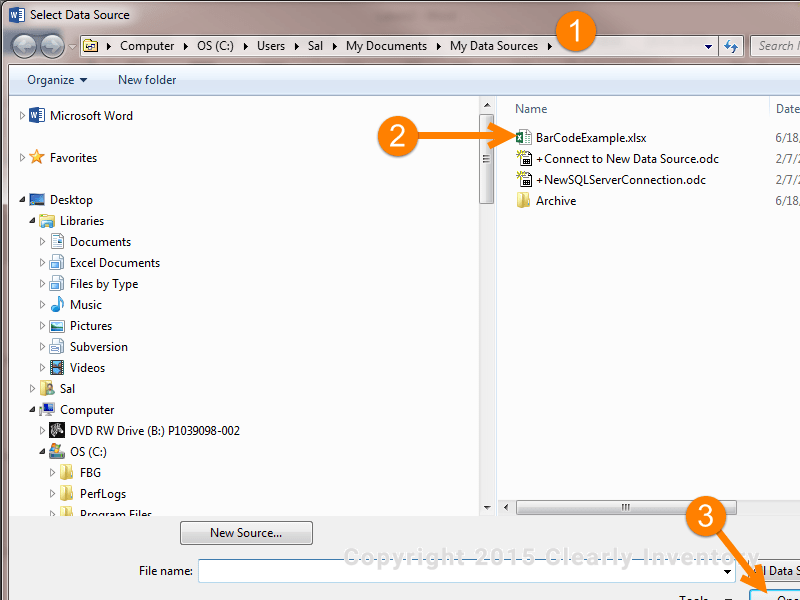
Remember how I told you to use the default My Data Sources location? This is why. MS Word will automatically open it when you click “Select Recipients”. It’s a real time-saver.
Select “BarCodeExample.xlsx” (you did follow my instructions earlier and use this name, right?).
Yes, the image got clipped, but I didn’t have time to fix it. So go complain to your coworker about it. Any who, click the “Open” button, even though we’re not going to actually open the spreadsheet.
Choose the file we saved earlier…
…By following these steps
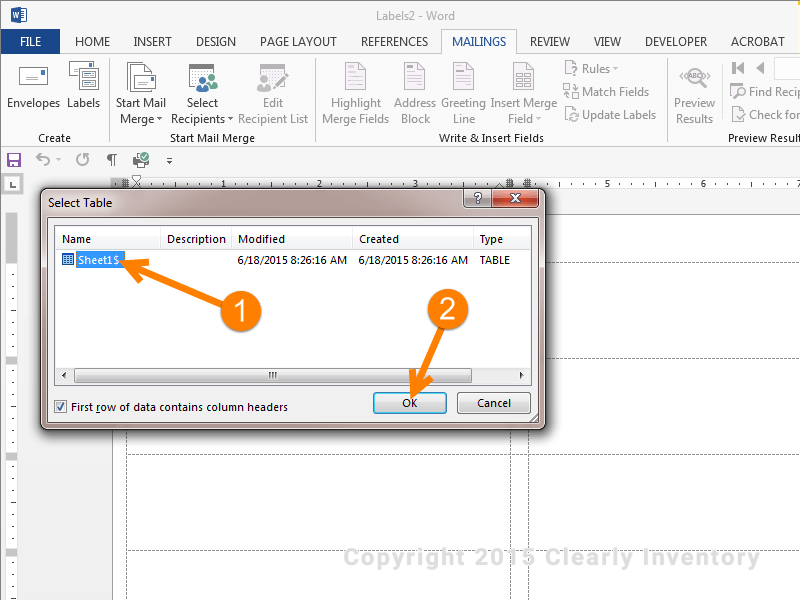
Depending on your default Excel settings, you might have more than one worksheet. I only have one. But if you have multiple worksheets in your Excel document, you will be asked to select the table. Just make sure to select “Sheet1$” like the arrow says.
Then click “OK”. Why doesn’t Word spell it out as “Okay”? I don’t know, okay? OK.
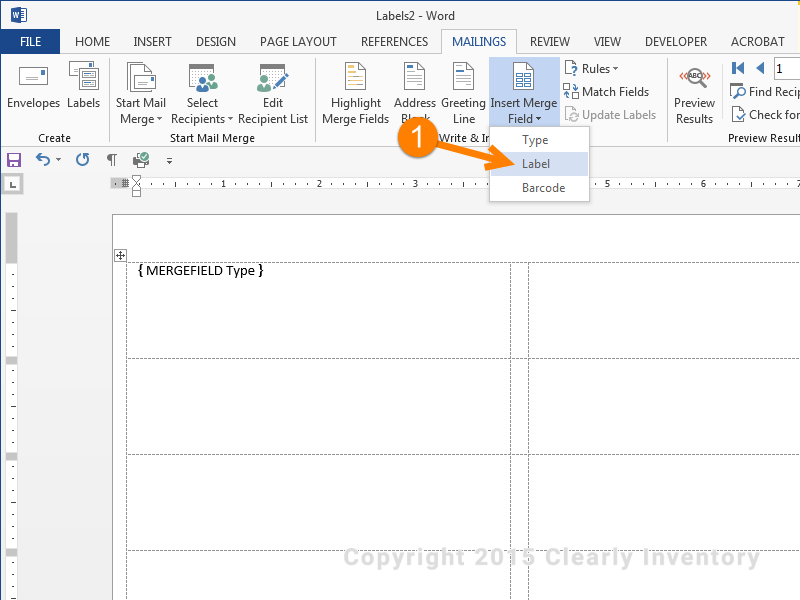
Insert a “Merge Field” called “Type”…
…By following these steps
Click on “Insert Merge Field”. Merge Fields are specially encoded fields that will pull data from data sources. Here, the Merge Fields will be showing information from our BarCodeExample table.
Hey, isn’t it interesting that the three options exactly match our table column headings? Not really. If you’ve been following directions, that’s what’s supposed to happen. But kind cool. Let’s select “Type” first.
Make sure the merge field is in the first label…
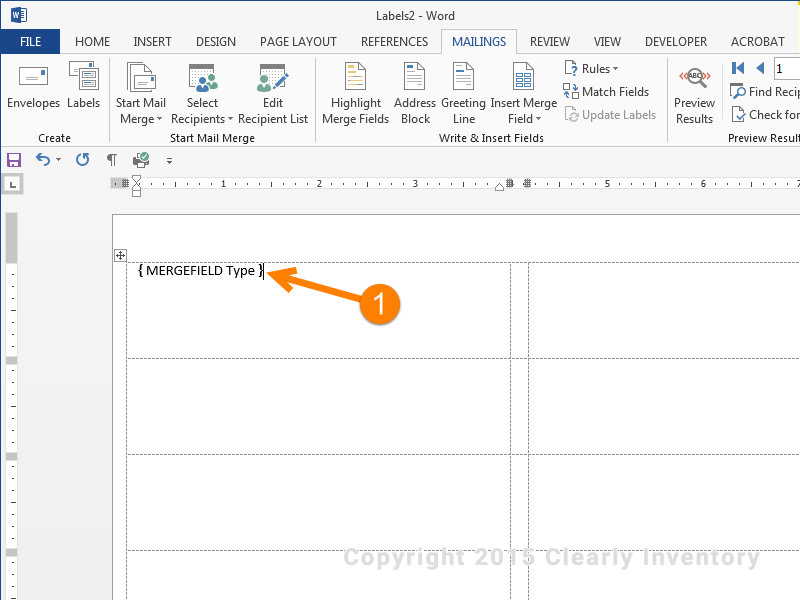
…By following these steps
Congratulations! You’ve inserted a MERGEFIELD. What’s going on here?
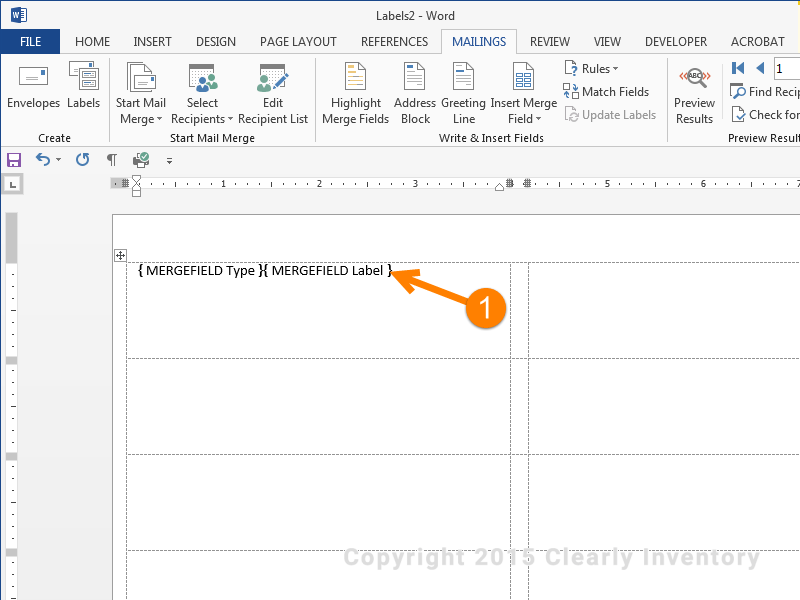
Insert a second “Merge Field” called “Label”…
…By following these steps
Same deal as above, only now we’re putting the “Label” in. This can be useful when you want a “human readable” section of the label. That’s why we created this column. We could have just used the barcode column, but sometimes barcodes need to have special characters that people don’t need to see, so it’s good practice to keep them separated.
Make sure the “Label” field looks like this…
…By following these steps
Your label should now look like this, with two merge fields. If it doesn’t, go call your mom. She misses you.
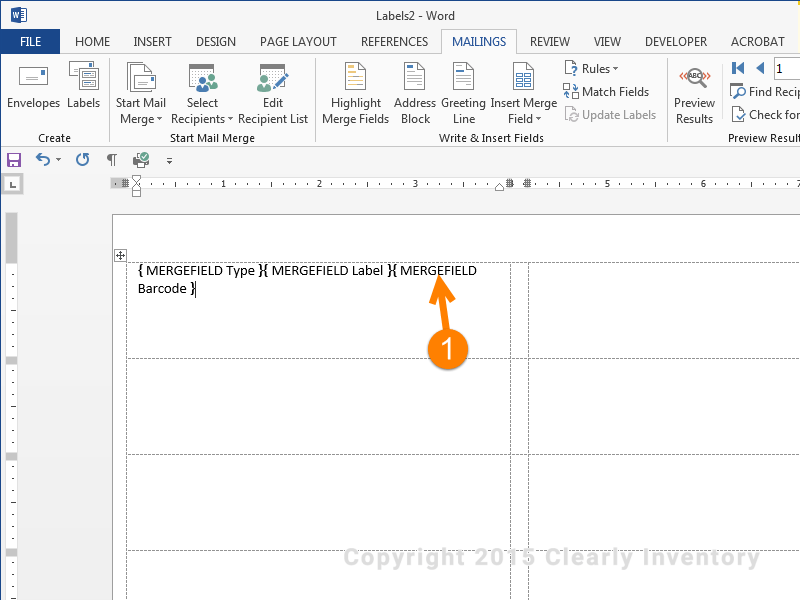
Finally, insert the “Barcode” merge field…
…By following these steps
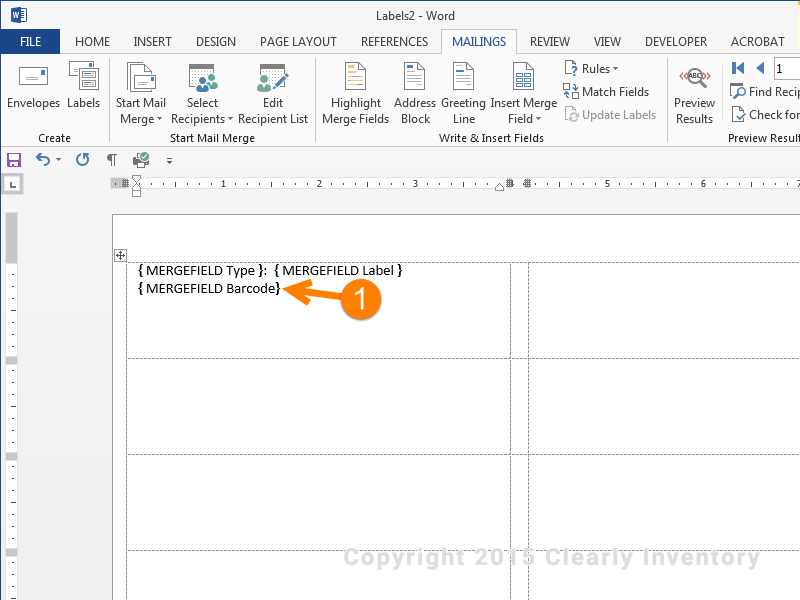
Repeat the above steps for the Barcode field. You’ll notice that they are all together. This will be hard to read, so format your label a little. See the next image and steps.
Format the label a little…
…By following these steps
Put a colon and space between the Type and Label fields, then add a hard “Return” or “Enter” to put the Barcode merge field on another line. When you’ve done that, it should look like the image to the left (except for the orange arrow and number).
This is the most important part of this tutorial…
…By following these steps
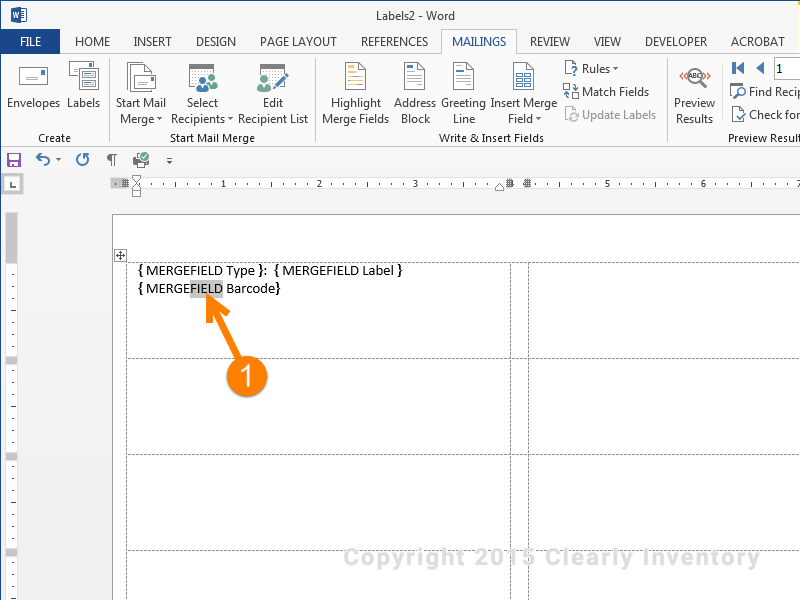
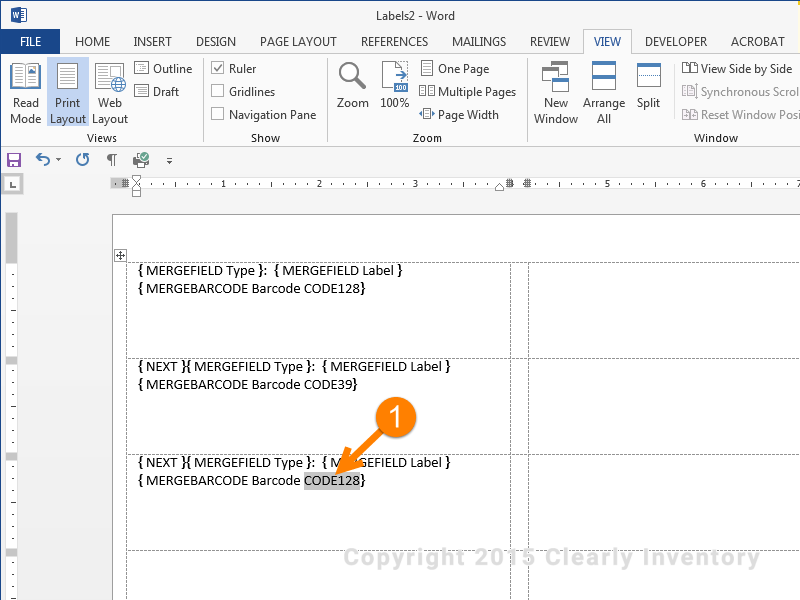
I’m ashamed to say it, but this part took me over two hours of research to figure out. For some reason, Microsoft doesn’t want you to know about it. We’re going to need to change the word “FIELD” to “BARCODE”. First, highlight the word “FIELD” exactly as you see here.
Change the highlighted “FIELD” to “BARCODE”…
…By following these steps
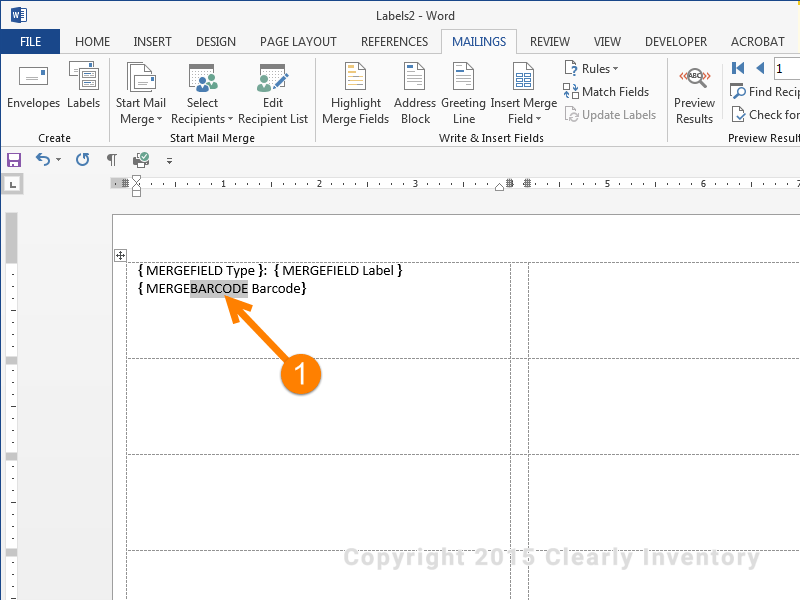
Now, type the word “BARCODE” instead. THIS is the secret sauce that makes it all possible.
Add the type of barcode here…
…By following these steps
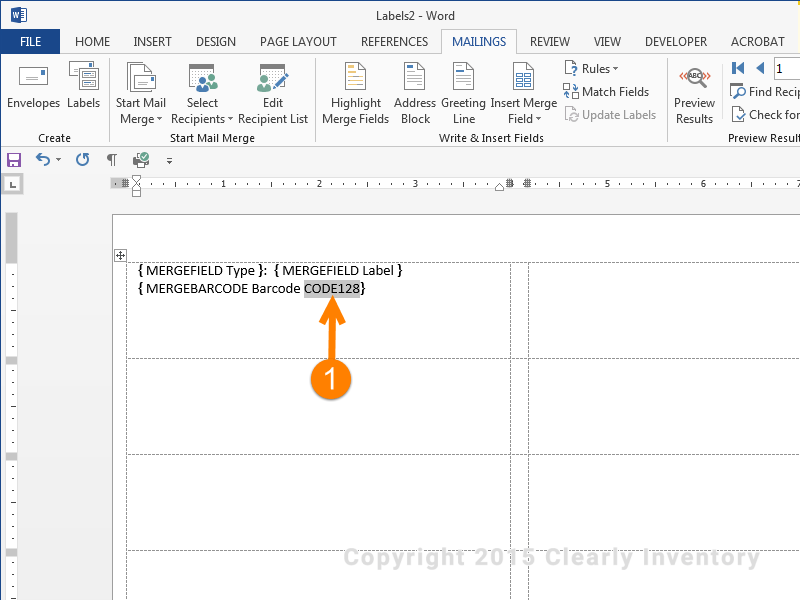
Now you need to tell the MERGEBARCODE field what kind of barcode font to use. So you need to type “CODE128” here to tell Word that “When you get the data in the Barcode column and present it here, make sure the font is CODE128.” We could just as easily tell it to make the font “CODE39” or “QR”, and we will.
This is how you add the other barcode labels…
…By following these steps
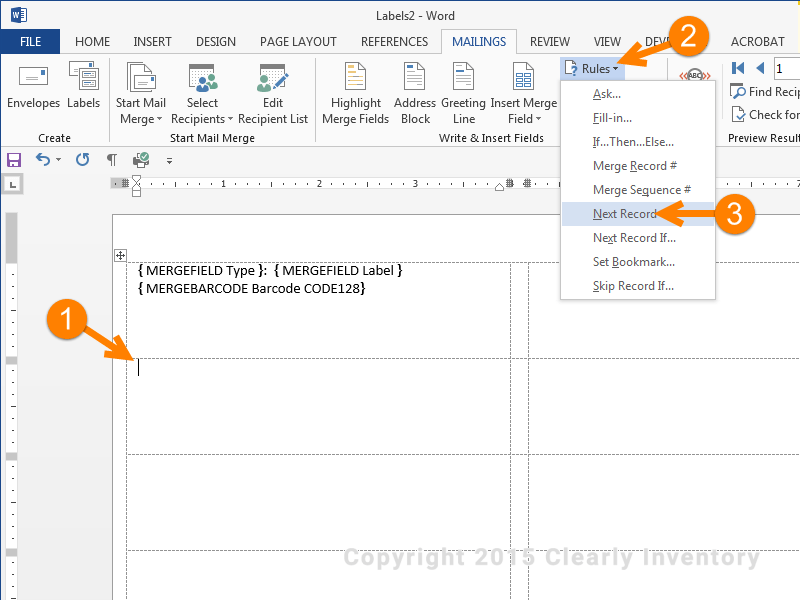
Now we have to tell Word to print another label, so make sure your cursor is in the top left of the next label area, as shown, and click on the “Rules” menu option.
This is where the “Rules” menu option is. Please click it.
Now click “Next Record”.
Make sure you precede the other labels with this code…
…By following these steps
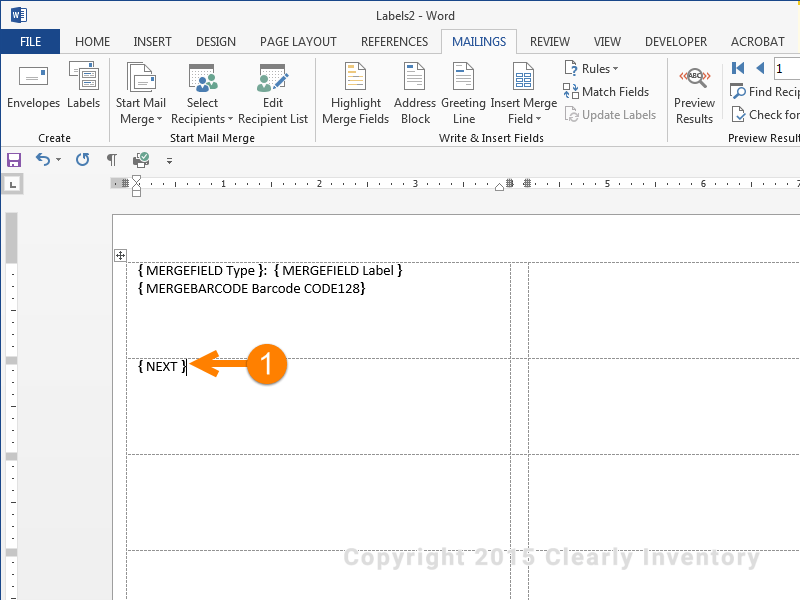
You’ll now see the “NEXT” merge field. This tells Word to go to the same Excel table and use the next row of values when pulling data from the columns. If this field is not present, Word will just repeat data from the same row again and again.
Now it’s time to copy and paste, just like first grade…
…By following these steps
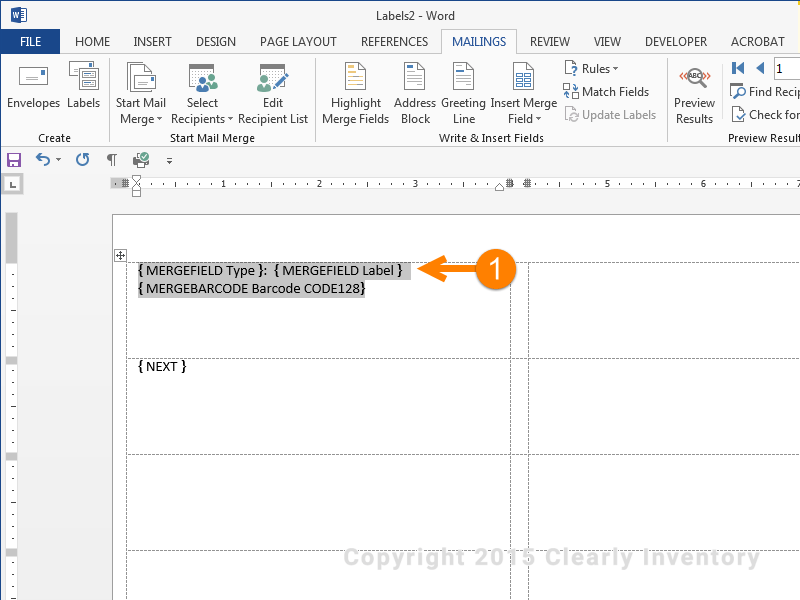
Now, select all of the merge fields from the first label, as you see here, and copy them.
And paste…

…By following these steps
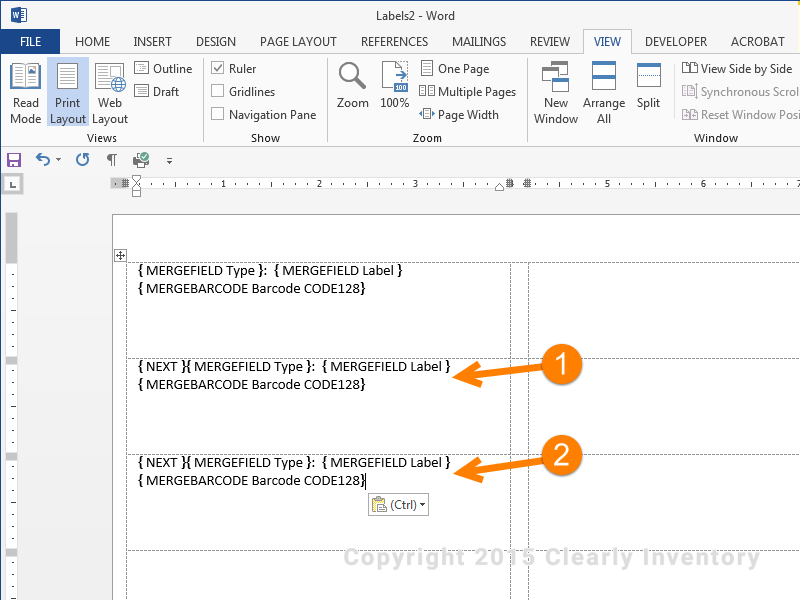
Paste the fields here after the “NEXT” merge field.
Rinse and repeat…
…By following these steps
Now copy this…
into the third label.
Don’t forget to change the barcode type…

…By following these steps
Now, let’s tell Word to use a different type of barcode font. In this case, we’ll replace the “128” with a “39” for “CODE39”.
To this…
…By following these steps
Make sure it now looks like this.
And don’t forget to change this barcode…
…By following these steps
Do the same for the last label. Select “CODE128” and…
To this…
…By following these steps
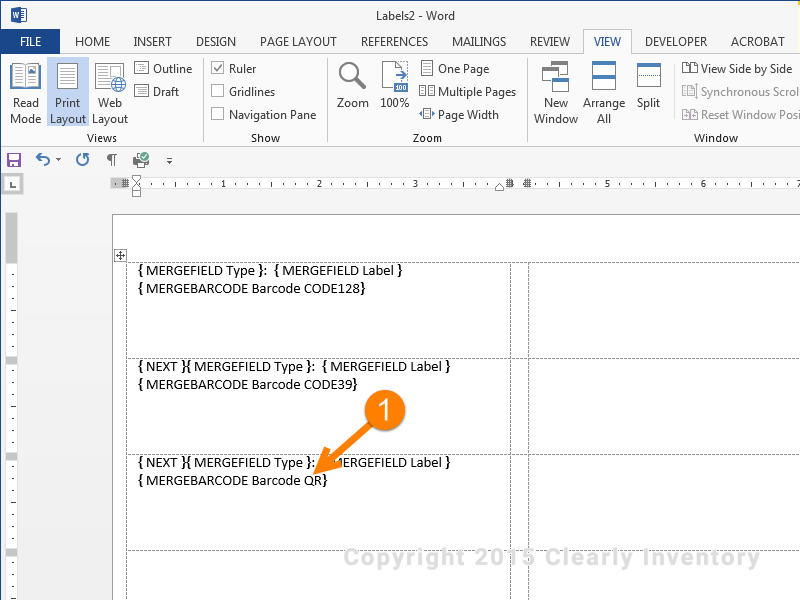
…type “QR”. Do not type the word “CODE” before “QR”; just type “QR” like I said to.
Now it’s time to put it all together…
…By following these steps
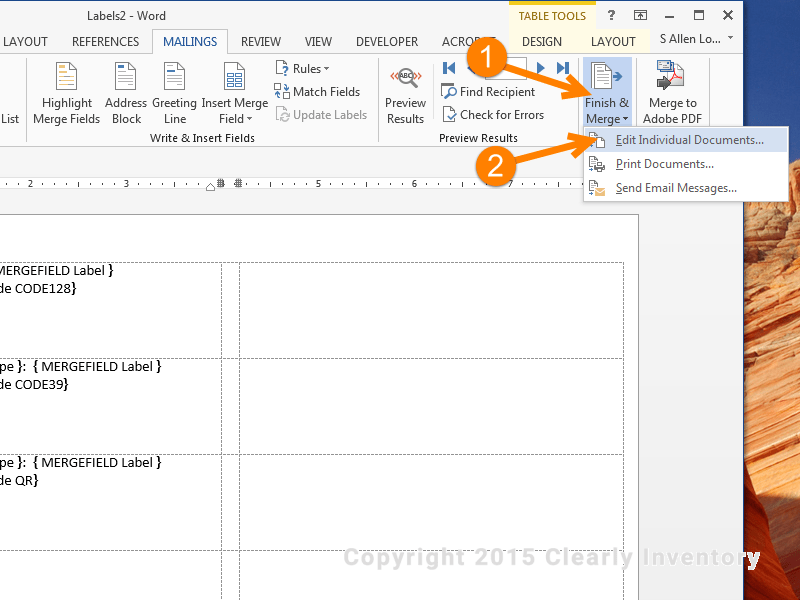
Click “Finish & Merge”. We are almost there now.
Select “Edit Individual Documents”. Do not select “Print Documents”. This will create a new completed document that you can edit.
Make sure “All” is selected and click “OK”…
…By following these steps
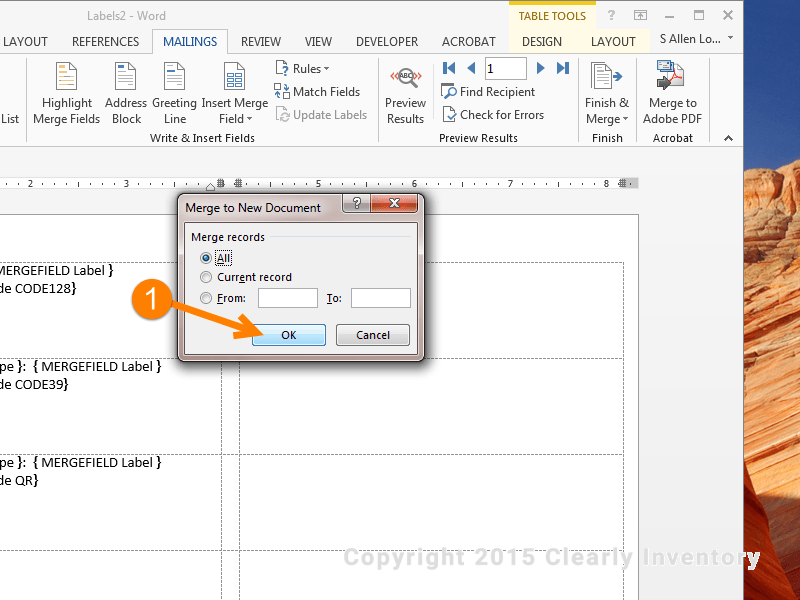
Make sure the “All” option is selected and click “OK”.
Hold your breath.
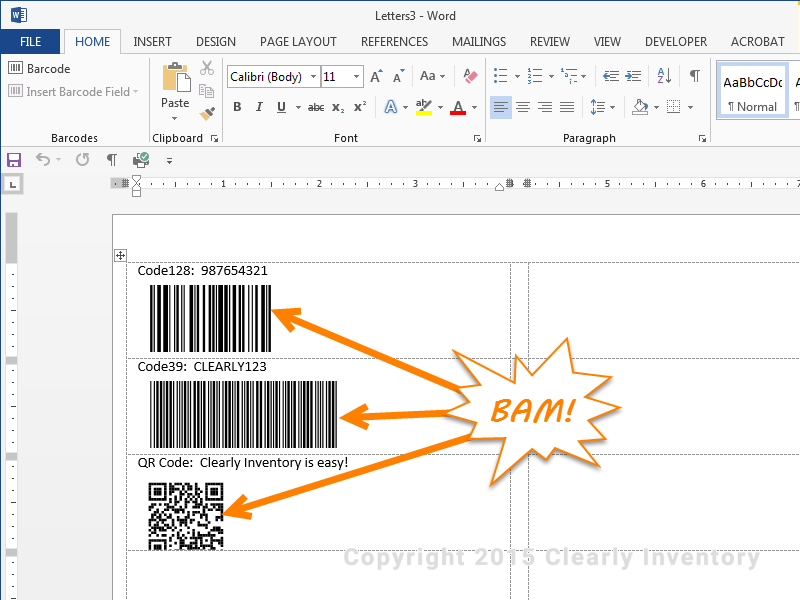
BAM! Call your Mom and let her know what you just did…
…By following these steps
Take a breath and enjoy the awesome sauce. You have just created barcodes of many varieties using only Microsoft Word and Excel.
Let’s arrange the codes a little better…
…By following these steps
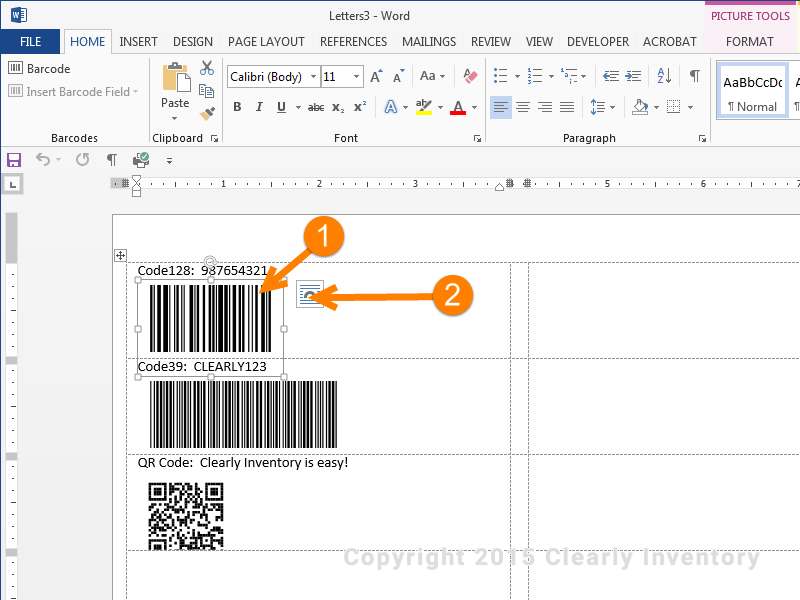
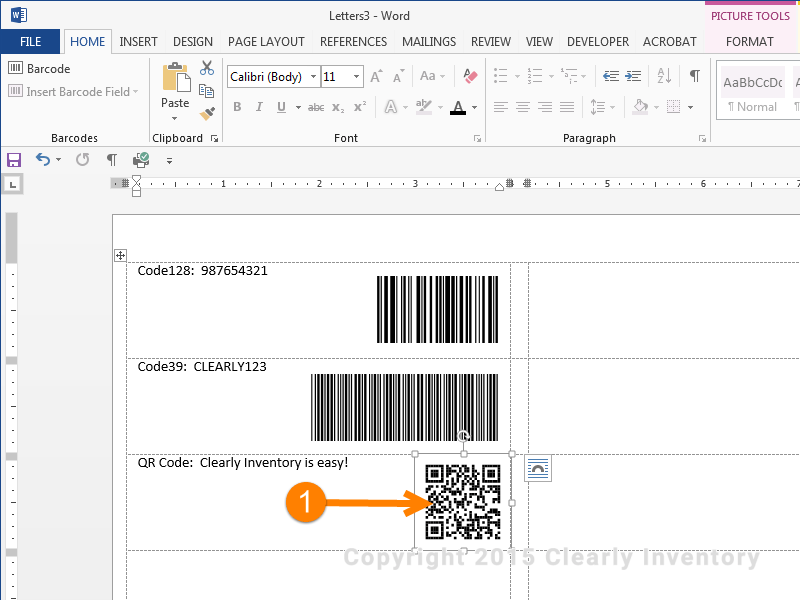
You will find that it’s difficult to move the barcode. This is because Microsoft defaults to the least usable image format. We’ll need to change that. Click the barcode.
Then click this little doohickey (I don’t know what it’s really called).
Select this option…
…By following these steps
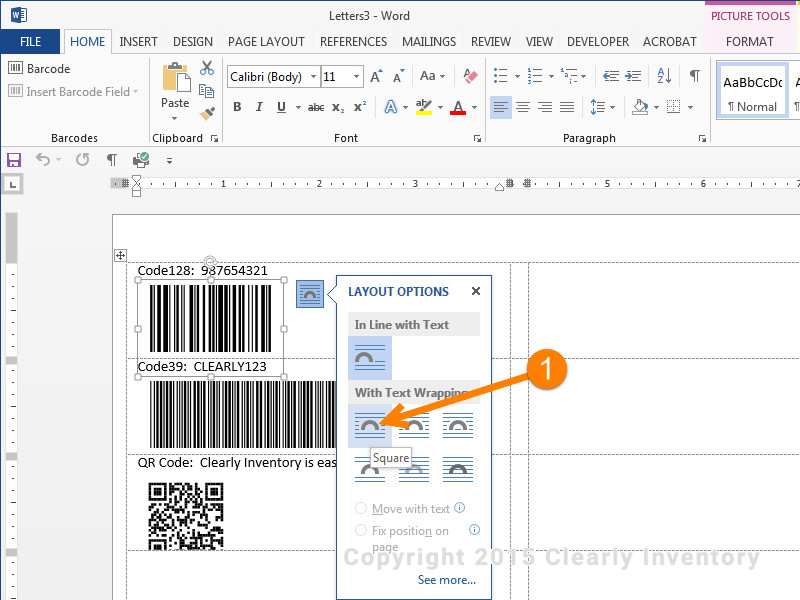
Chose this option: “Square”.
Now you can easily move the barcode…
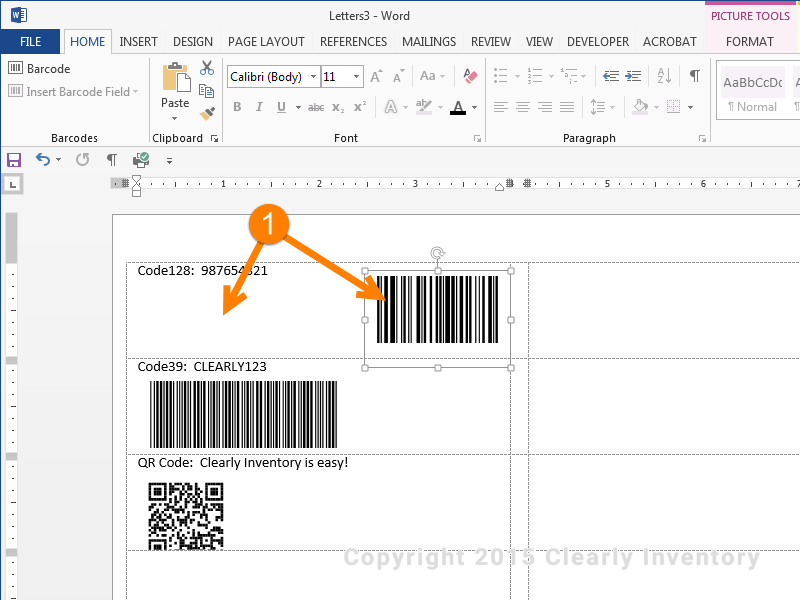
…By following these steps
Now you can easily move the barcode…
Arrange the other barcodes…
…By following these steps
Do the same with the other barcodes just to practice
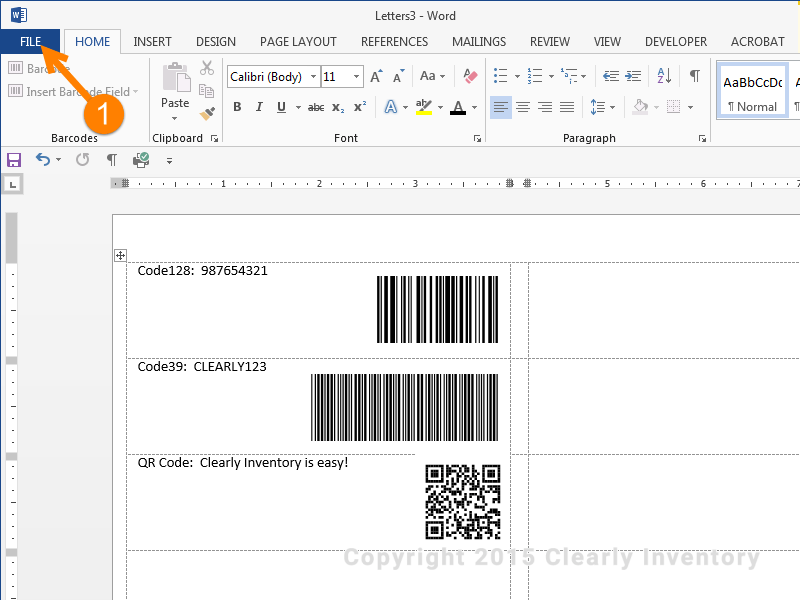
Click “File”…
…By following these steps
And we’re ready to print these bad boys. Click “File”.
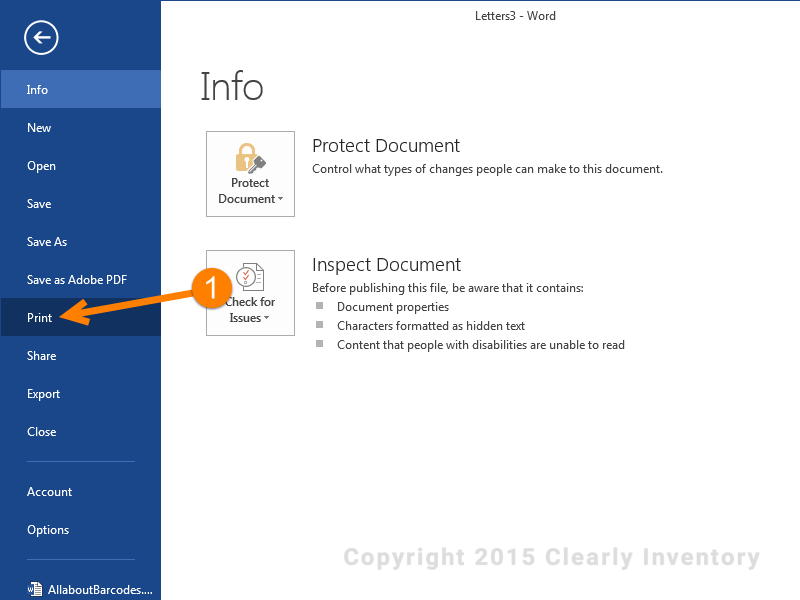
And print…
…By following these steps
Then click “Print” and follow the print dialogs. You don’t have to have label stock in your printer; just regular paper is fine for this test.
The above method is a great way to print lots of barcode labels without spending a lot of money or using new software or hardware. It’s also helpful when you’re doing a large batch of barcodes. You will find lots of software and hardware that is more “barcode friendly,” but those will all cost money, and some can be really expensive when using a database. For example, the Zebra GC420 line of thermal printers comes with some great barcode software for free, but if you want to hook it up to a table like we did here, it’s going to cost you around $400
Now that you know the basics, you can start to play around with different ideas. There are even more controls available for the barcodes. For a complete description, go to this website from Microsoft that explains how to write MERGEBARCODE fields and options. To learn more about good inventory management techniques, visit our Inventory Basics page.